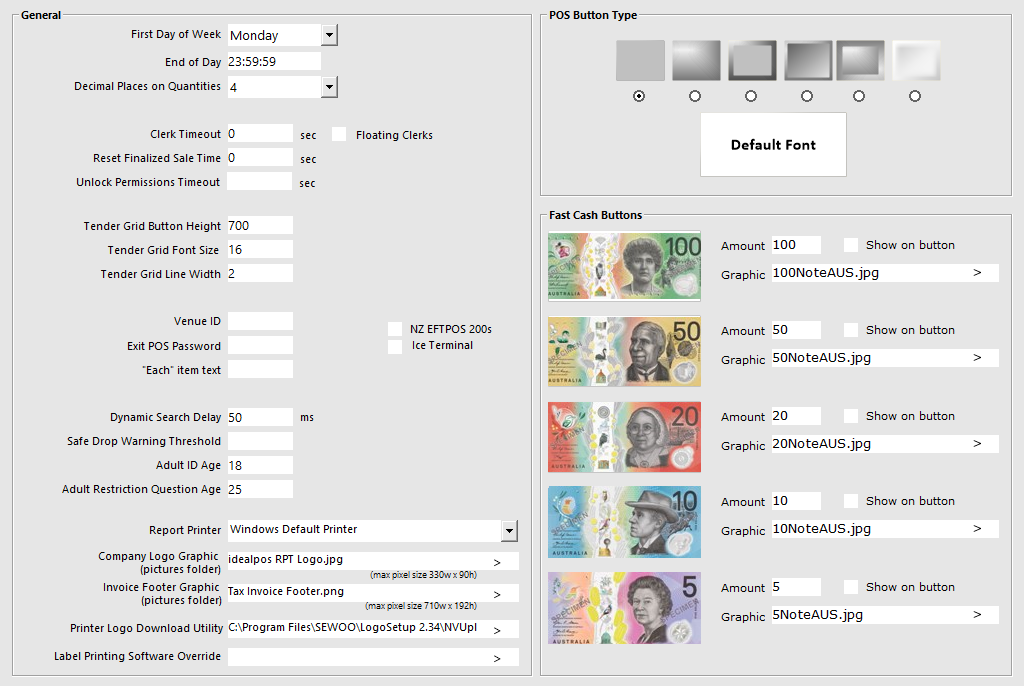
The General Tab is broken up into three different sections which are:

The General section contains different fields that can be configured to change the way certain functions operate.
Generally, once these settings have been configured, there will be minimal reason to edit them.
This field works similar to the End of Day field, in that all reports selected as “Week to Date” will be calculated from the beginning of this selection.
This field will specify the time in 24hr format that you wish to have as your “Day Change”.
All reports will default to this time when you select “Today”.
As many hospitality businesses trade outside of normal hours, they can select for the end of day to be 02:59:59.
This drop down box allows you to specify decimal places from 0 > 4.
These only apply to goods being purchased and any stock levels displayed when performing a Stocktake.
Some reports will also reflect this setting.
This setting will require the clerk to re-enter their code after a set amount of inactivity.
This setting is should be in Seconds.
By default, the setting is 0 and this will mean that there is no timeout.
This setting can also be used to have Idealpos automatically return to the Home Screen after the Clerk Timeout period lapses.
To configure this, turn off the Yes/No Option "Return to Home Screen after Each Sale" and ensure that a Clerk Timeout other than 0 has been configured.
Also ensure that you turn off the Yes/No Option "Compulsory Clerk", otherwise Idealpos will not automatically return to the Home Screen after the Clerk Timeout period lapses.
Any changes to the Clerk Timeout settings will require a restart of Idealpos in order for the change to apply.
In order to use this option, the following settings must be enabled:
When this checkbox and the above options are enabled, the Clerk Timeout will apply to active sales.
When items are added to a sale and the POS terminal is left to idle for the amount of time configured in the Clerk Timeout field, the terminal will return to the ENTER CLERK prompt.
The Clerk can then login to any POS terminal with their Clerk ID and the items that were added to the previous non-finalised sale will appear, allowing the Clerk to continue processing the sale.
In addition to waiting for the Clerk Timeout, the Clerk button on the POS screen can still be used to return to the ENTER CLERK prompt, allowing the Clerk to continue the sale by logging into any POS terminal.
This function may be useful in environments such as butcher shops where a Clerk will frequently move between POS terminals in order to perform tasks such as weighing stock using a scale that may only be available from a specific POS terminal in the store.
This setting will allow the Change amount to display at the end of a sale before the POS Screen will reset.
This setting should be in Seconds.
By default the setting is 0.
If there is no change to be given, the screen will be reset regardless of this setting.
This function allows you to turn off permissions for the set period of time.
It is useful because it allows you to turn them off and they will automatically turn back on.
This setting will allow more Tenders to be displayed in the tender section of the POS Screen.
Although this setting can be changed, if left at default the tenders will resize accordingly.
Setting: 630
Setting: 750
This setting will enlarge the font of the Tender description.
Setting: 16
Setting: 24
This setting controls the width of the line separating the different Tenders.
Setting: 1
Setting: 5
These must be selected if you are using the integrated EFTPOS with either of these terminals.
This field will only need to be used if you participate in the Liquor File/Price Book module.
They will provide you with the ID number that needs to be entered here.
Entering any characters into this field will initiate the requirements for entering a password each time an operator would like to exit the POS Screen or the Home Screen.
This setting will display the unit of measurement used on the customer receipt if you are using Kg, g or Lbs.
This setting is set to 50 by Default.
It is the amount of time that Idealpos will wait after a value has been entered into a search box before it dynamically starts searching for Stock Items or Customers.
It may be useful to increase this delay in cases where you want to allow the user more time to finish entering their search query before Idealpos should start dynamically updating the search results based on the entered search query.
This setting allows you to set a limit for the maximum amount of cash that you want kept in the POS cash drawer during trade.
The amount of cash in the cash drawer is calculated automatically as you tender sales using the Cash Tender and when you give change to customers.
Once the limit is reached, a message will appear on the POS screen.
When the Clerk is presented with the alert, they can call for a Safe/Cash Drop so the amount of cash in the drawer can be reduced to a safe level.
The warning will appear for every sale until either an End of Shift or Paid Out is performed which will trigger this function to be reset.
Enter a $ amount that you want to trigger the warning.
Allows you to configure the date of legal drinking age that displays on the POS Screen above the Sale window on the left.
Different countries have a different legal drinking age.
This does not display by default, and is toggled by a Yes/No Option: Show Adult ID Date.

Allows you to record an ID against a sale if the customer is deemed to look under the age specified.
It is configured by Department, and anything sold from that Department will prompt the operator to choose if they need to see an ID or not.
For more information about configuring and using this function, refer to the topic Adult Age Restriction.
This allows you to set a Report Printer that will be used regardless of any Windows Default Printers.
Select the printer you want to use from the drop-down box.
This is the Company Logo that you want to display on the Customer Statement.
This image size should be 330 x 90px and must be stored in the Pictures Folder, located within the Idealpos 7 Pictures folder.
The Pictures folder is typically available in the following location, but this may vary based on the Operating System:
C:\ProgramData\Idealpos Solutions\Idealpos\Pictures\
This functionality allows you to create a graphic that can be used when printing A4 Tax Invoices.
The graphic must measure max 710 x 192px.
The graphic must be saved in the Pictures folder of the Idealpos 7 location.
The Pictures folder is typically available in the following location, but may vary based on the Operating System:
C:\ProgramData\Idealpos Solutions\Idealpos\Pictures\
This field must contain the application path to the .exe file that is used to send and save logos to the receipt or kitchen printer.
This will also be required if sending logos to the receipt printers for Coupons.
If you need to override the exe location for DesignPro to be able to print labels.
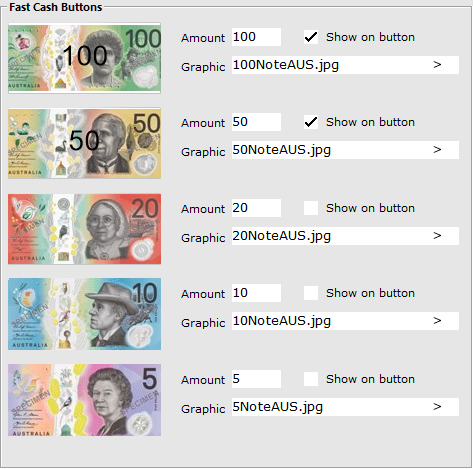
This section is used to define the currency denominations that are displayed when processing a transaction through the POS Screen.
Idealpos includes denominations for Australian, Canadian, South African, New Zealand, Saudi Arabian, Singaporean, USA and Indian notes.
The images and denominations will be automatically configured for the region that is selected via Setup > POS Terminals > Modify > Main Settings > User Details > Region.
After the region has been set, you will need to restart Idealpos for the change to take effect.
If required, you can source your own denomination images and configure them to appear.
Each POS Terminal can be configured to either show or hide the Fast Cash Buttons on the POS Screen.
To control whether the Preset Tenders are displayed, go to: Back Office > Setup > Yes/No Options and toggle the Yes/No Option 'Show Preset Tenders'.
Enabling the tickbox for this option will Show Preset Tenders, and disabling the tickbox for this option will Hide Preset Tenders.
The amount that has been assigned to the denomination Fast Cash Button will be deducted from the due amount when the Fast Cash button is pressed on the tender screen.
If the "Show on Button" check box is enabled, the amount will be displayed on top of the denomination graphic.
This field will need to link to the image file, which must be located in the Pictures folder of Idealpos.
The Pictures folder is typically available in the following location, but this may vary based on the Operating System:
C:\ProgramData\Idealpos Solutions\Idealpos\Pictures\
